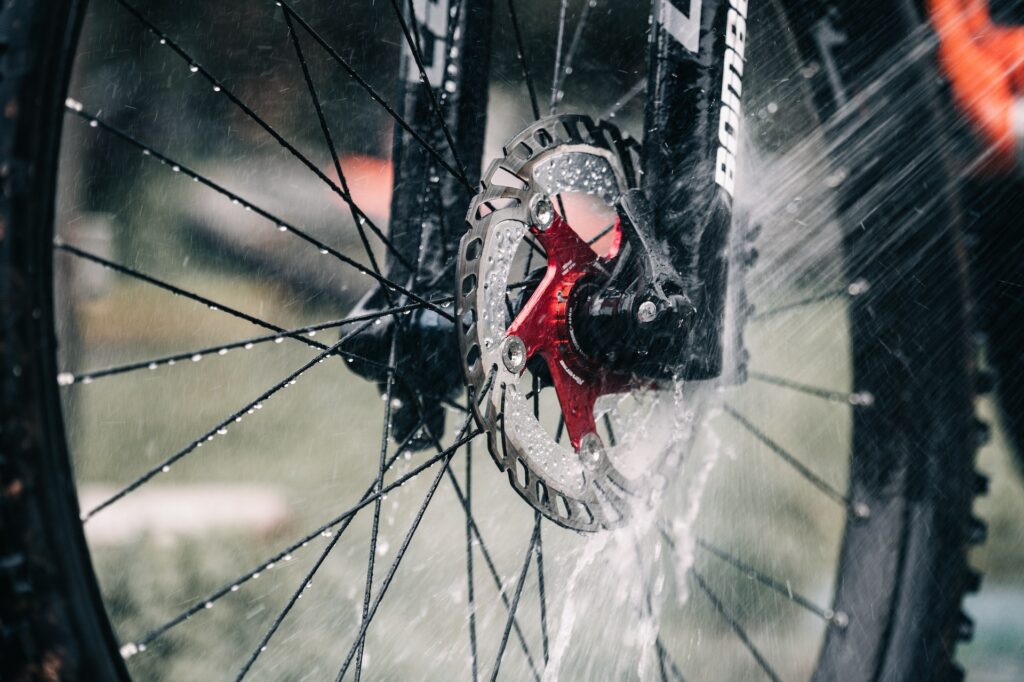
The Importance of Proper Brake Maintenance
When it comes to bike brakes, there are a few different types of brakes that are available. A popular brake type and one of the most commonly used on modern-day bikes, from hardy mountain bikes to commuting and road bikes, is the disc brake mechanism. With that in mind, we’re here to help you on your biking journey with our guide to disc brake cleaning and maintenance!
Regular maintenance and cleaning not only ensure that your bicycle’s disc brakes are in good working order, which is essential for your safety and riding experience, but it will also prolong the lifespan of your brake system. We all understand the significance of having reliable stopping power on our bikes, right? So let’s make sure your brakes are in good working order and ready to keep you safe and confident on your rides!
How do bicycle brakes work?
When it comes to Disc Brakes, your componentry will consist of a lever on the handlebar that pulls a cable (cable disc brakes) or forces hydraulic fluid down a hose that will be connected directly to the brake calliper (hydraulic disc brakes). Your brake calliper will be centred over your rotor disc, and when the lever is pulled, will push brake pads inwards towards the rotor, ultimately slowing or stopping the bike. Learn how to keep your brakes in tip-top shape with our beginner’s guide to disc brake cleaning.
What Can I Use to Clean Bike Brakes?
To clean your bike brakes, specifically the rotors and brake pads, it’s helpful to gather the necessary tools and equipment. Here are the items you’ll need:
- Isopropyl alcohol or a dedicated disc brake cleaner (removes contaminants like dirt and oil without leaving any residue, which can reduce their efficiency)
- Clean, lint-free cloth or paper towels
- Small brush (soft-bristle toothbrush or dedicated brake brush)
- Latex gloves (optional but recommended)
- Brake pad alignment tool (helpful for precise pad positioning when removing or adjusting brake pads)
Can WD-40 Be Used as Bike Brake Cleaner?
While WD-40 is a versatile lubricant and can be useful for many bike maintenance tasks, WD-40 must never be used as a brake cleaner. Using a spray oil like WD-40 will severely contaminate both the braking surface and brake pads, rendering them useless and in need of replacement. Instead, use isopropyl alcohol or a dedicated brake cleaner specifically formulated for cleaning bike brakes.
Preventing Problems Before They Happen
Picture this: you’re zooming down the trail, feeling like a superhero on two wheels. Suddenly, you need to hit the brakes. This is not the point you want to wish you kept them well maintained! Regular maintenance is crucial for preventing issues with your bike’s disc brakes. So, give them the love they deserve with these simple tips.
How do I Clean Disc Rotors, Brake Calipers, and Brake Pads?
Whilst not necessary after every ride, your bike and braking components will thank you for the occasional thorough clean.
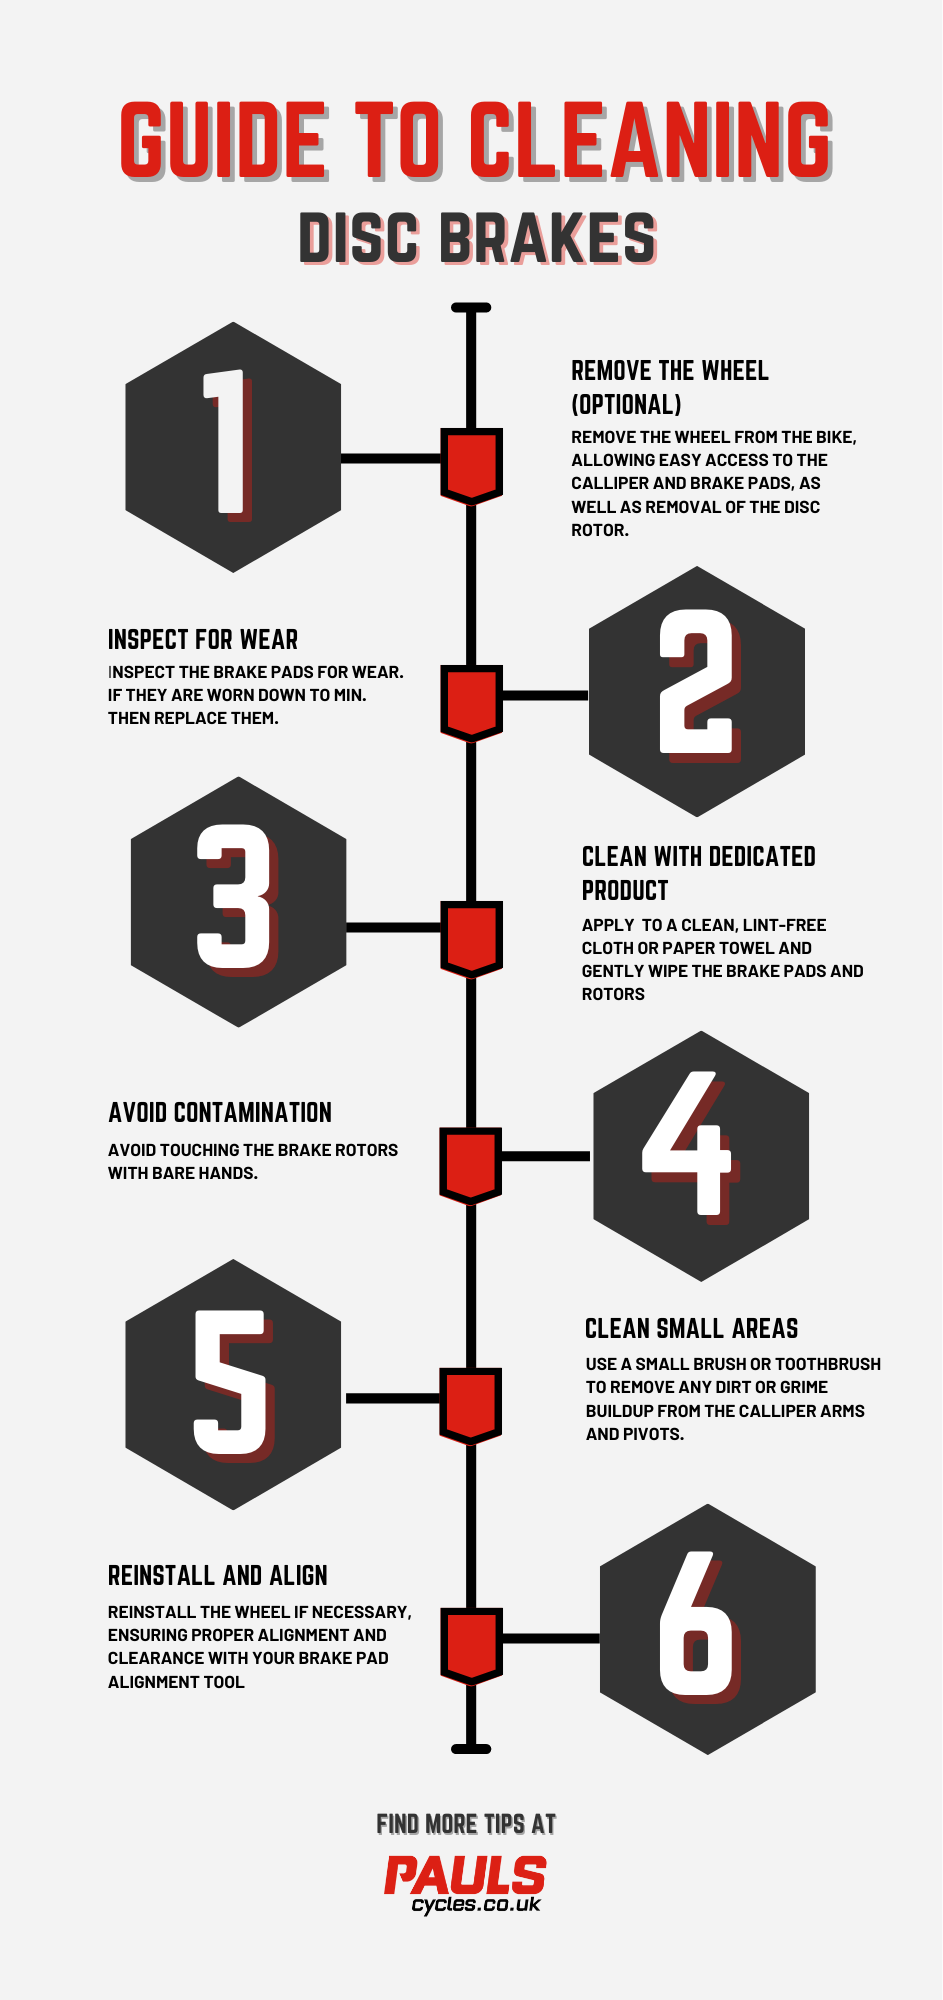
- (Optional) Remove the wheel from the bike, allowing easy access to the calliper and brake pads, as well as removal of the disc rotor.
- Inspect the brake pads for wear. If they are worn down to the recommended minimum thickness or are damaged, replace them.
- Apply the isopropyl alcohol or a dedicated brake cleaner to a clean, lint-free cloth or paper towel and gently wipe the brake pads and rotors. If you haven’t removed the wheel and disc rotor, you particularly want to avoid spraying the cleaner directly onto the brakes and rotors, as it can potentially damage other bike components by pushing dirt within the system. The same applies with a pressure washer.
- Avoid touching the brake rotors with bare hands, as the oils from your skin can contaminate the surface (this is where your latex gloves come in handy!).
- Use a small brush or toothbrush to remove any dirt or grime buildup from the calliper arms and pivots.
- Reinstall the wheel if necessary, ensuring proper alignment and clearance with your brake pad alignment tool
How Do You Know Brake Discs Are Worn?
Brake discs, also known as rotors, don’t need replacing often unless they are damaged. However, they can wear down over time. If you feel like your bike has less braking power, we’d recommend checking the brake pads for wear in the first instance. That said, signs of worn brake discs include visible scoring or deep grooves on the rotor’s surface, reduced braking performance or increased stopping distance, and excessive heat buildup, warping, or discoloration on the rotor.
If you notice any of these signs, it’s essential to replace or repair the brake discs. You will want to ensure you select the correct replacement parts and these are safely installed, so we’d recommend consulting a professional bike mechanic.
Why are my brakes squeaking?
These potential causes can help with troubleshooting your squeaky brakes. However, it’s important to keep in mind that sometimes the squeaking may persist, even after your best efforts, if there’s some more advanced mechanical maintenance that needs to be carried out.
- Brake pads are worn: One of the primary reasons for brake squeaking is worn brake pads. Over time, brake pads naturally wear down, and as they approach their minimum thickness they can start producing a squeaking sound. Inspect your brake pads regularly and replace them if they are worn down to the recommended minimum thickness. Different manufacturers will have specific recommendations of the minimum brake pad thickness, but as a general rule, we’d recommend you don’t let them get below 1mm thickness.
- Rotors are out of true and rubbing brake pads: Another potential cause of brake squeaking is when the brake rotor becomes warped or out of true. A slightly bent or uneven rotor can lead to the brake pads making inconsistent contact, resulting in a squealing noise. If you suspect rotor issues, you may need to use a rotor truing tool or seek help from a professional bike mechanic to correct the alignment.
- Rotors are contaminated with dirt or oils: Contaminated rotors can also contribute to brake squeaking. Dirt, oil, or other substances can build up on the rotor surface over time, compromising the pad’s ability to grip the rotor properly. Cleaning the rotors with isopropyl alcohol or a dedicated brake cleaner can help remove contaminants and reduce squeaking.
- Callipers aren’t centred over the rotor: Improper calliper alignment can cause brake squeaking as well. If the calliper isn’t centered properly over the rotor, it can result in uneven pressure and contact with the brake pads. Adjusting the calliper position to ensure it is aligned correctly can help eliminate squeaking.
How Long Do Brake Pads Last?
The lifespan of brake pads can vary depending on usage, riding conditions, and brake type. On average, brake pads for disc brakes should last between 1,000 to 2,000 miles (1,600 to 3,200km). You might find that wet and gritty conditions, such as those you’ll encounter on a Gravel Bike, will cause brake pads to wear much faster as sand and dirt splashed up from the tyres will act as a grinding paste. After wet and mucky rides, rinsing out this grit can help prevent a build-up and prolong the life of your brakes. Regularly inspect your brake pads for wear, and replace them if they are worn down to the recommended minimum thickness. It’s essential to check your brake manufacturer’s recommendations for specific brake models and consult a professional bike mechanic if you are at all in doubt.
How to Bleed Your Bike Brakes
Over time, air bubbles can enter the brake system, causing a loss of braking power. Bleeding your brakes is the process of emptying the hydraulic brake system of brake fluid and simultaneously inserting new fluid. This removes bubbles and restores optimal performance.
You may want to consult a professional bike mechanic for this task, as it can require specialised tools and knowledge and is considered a more advanced maintenance task. If there is damage to the cable/hose, the hose will need replacing before the bleeding process. To bleed your mountain bike brakes, you will need to follow the specific bleeding procedure for your brake system as this process will vary for different brands. Typically, bleeding your brakes will involve opening the bleed ports, injecting brake fluid, and purging air bubbles. Once the process is complete, you’ll want to ensure the lever feels firm and responsive and double-check for any leaks.
And What if My Brakes Need Repairing?
In some cases, your bike’s disc brakes may require more than regular maintenance and cleaning. When faced with issues beyond your expertise, it’s wise to consult a professional bike mechanic. They have the specialised tools, knowledge, and experience to diagnose and resolve complex brake problems. Additionally, certain repairs, such as adjusting brake alignment or replacing hydraulic components, may require specific expertise.
Trust Pauls Cycles for Expert Maintenance
Taking care of your bike’s disc brakes is an essential aspect of overall bike maintenance. By following the tips outlined in this guide, you can ensure your brakes are clean, properly maintained, and perform optimally. For a wide range of high-quality tools and products to help make those tasks a little easier, shop tools and maintenance at Pauls Cycles.
If you’re interested in more tips and tricks on care and maintenance to keep your bike in tip-top shape, be sure to check out more Bike Maintenance Guides in our Pauls Cycles Advice Hub.
Is bike maintenance not for you? Or feeling a little out of your depth? Remember, when it comes to complex repairs or adjustments, it’s always wise to seek professional assistance. Sometimes bike maintenance requires a trained pair of hands to give your bike the best care. By entrusting your bike to our experienced, fully-qualified mechanics, you can ensure that it receives the attention and care it deserves. Visit our Workshop & Bike Servicing Centre at our Showroom in Dereham, Norfolk.
Stay safe and ride with Pauls!


